Blender 3D
Trying 3D animation in Blender
I have an old ambition to try 3D animation using Blender. There are many levels at which this can get complicated (have a look at the end credits on a high-profile animated movie), but I have a pretty good casual hobbyist’s feel for Blender’s modelling and rigging features, so I felt equipped to learn the missing bits to posing and rendering something simple.
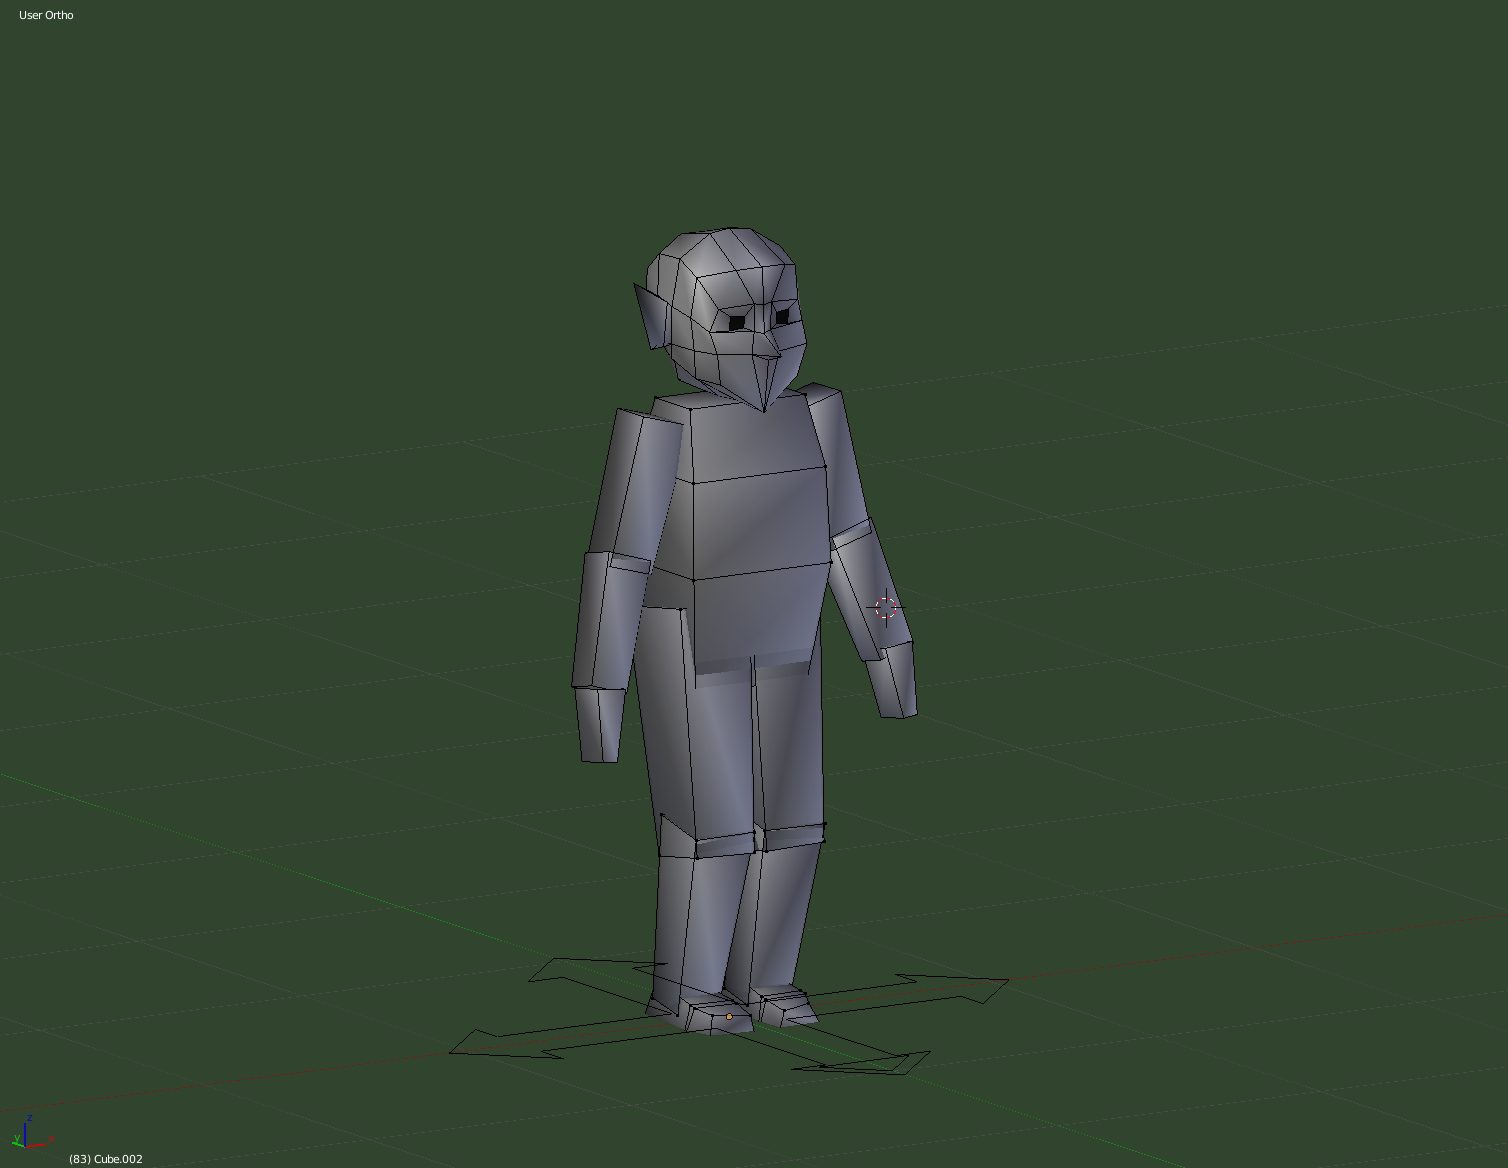
I used a very simple character model, consisting of very few mesh points – I started with rectangular prisms (specifically, this being Blender, cubes) for all body parts, and tweaked the corners, and added vertex loops to make some bits bendable. I then used Blender’s subdivision surface (“subsurf”) modifier to shrink everything into smooth shapes.
Aside: Blender’s subdivision surface modifier uses the Catmull-Clark algorithm published in 1978 by then NYIT researchers Ed Catmull (now president of Pixar and Disney) and Jim Clark. (Abstract)
What my model looks like without the subsurf modifier:

What the subsurf modifier turns it into:

Each limb segment has its own bone in the armature which controls it completely (and doesn’t control anything else). This is as simple a scenario as you can make. It’s robotic, but is also a huge time-saver allowing me to concentrate on posing and not on modelling or rigging a character. As it turns out, my animating skills made the motion robotic anyway, so nothing lost aesthetically this time around.
One thing I learned while tinkering with rigging is that the simplest armature to use is far from simple to make. Luckily, another thing I learned is that the Rigify plugin, by Nathan Vegdahl, will generate the complicated rig from a simple dummy armature which you fit to your model’s joints. It has user-friendly controls which can be exposed or hidden selectively as needed.
The Rigify script provides three major features to clinch the deal for me: Buttons to show/hide different controls on the armature during posing, inverse/forward kinematic switching for arms and legs with a slider, and IK-FK or FK-IK snapping, which matches both sets of control bones so that a switch can be made seamlessly. I made one tiny modification to the foot portion of the generated rig, explained below.
Here’s the model being posed using the armature generated by Rigify:

For the practice material, I chose a movie of my kid doing a silly dance out in a field, and this was probably too ambitious. There were a lot of small anomalous movements, and as it turns out, seven seconds is a lot for a raw beginner to animate.
Here’s the video I generated:
I did go down a rabbit-hole trying to improve the foot rig. There are two obvious ways to rotate a foot: keeping the ankle in place, or keeping the toe in place. The standard Rigify rig, in both IK and FK modes, rotates the foot around the ankle. Put a keyframe before and after the rotation, and Blender interpolates the rotation for frames between. If you need a rotation of the heel around a stationary toe, there’s no simple rotation in the armature to solve that, so each keyframe used in the motion has to store a rotation and a new position. If I store only two keyframes, one at the start and one at the end of the rotation, the foot will move linearly between them; not at all what I want. The solution is to key enough frames that the eye doesn’t notice the linear moves. This may mean a keyframe for every frame to be animated.
One solution I came up with was to add a bone at the toe, inserting it as a child of the foot.ik bone and a parent of everything that had been below it. This works surprisingly well, except that if the figure is locomoting itself by a pivot at the toe, some matching has to be done to keep the new foot position while returning the toe-bone’s rotation to zero (i.e. putting it back where the figure mesh’s toe has been placed). That problem doesn’t come up in the case of lifting the heel while keeping the toe still, because the action is bound to be reversed to bring the heel down before it is needed to lift it again. In principle one could write a Python script to create a position-matching button akin to the one Rigify has for FK-IK matching.
Any more elegant ideas I came up with inevitably invoked a cyclic dependency where the position or rotation of one bone depended upon that of a bone whose position or rotation depended upon it. In general, try as I may, I have never managed to improve upon any element of the Rigify rig, but through trying, I arrived at a sufficient understanding of rigging that I’m confident there’s a good reason for all the layers of bones and the interdependencies and constraints, and I’m happy to use the exposed controls without a lot of anxiety over the mechanisms beneath them. A lot of the design decisions in Rigify are illustrated in detail in Nathan Vegdahl’s (excellent, I can already say, even though I haven’t watched most of it yet) Humane Rigging video tutorial series.
The PitchiPoy version of the Rigify script uses a different foot solution, and I used that for my next exercise.